Saturday, July 16, 2011

Frozen Coconut S'mores

I just wanted stop in and share a great little recipe that I found in the August 2011 edition of Woman's Day Magazine.  It is a no fuss, no bake dessert that will be great for these HOT Summer days we are having.
Hope you Enjoy!

Frozen Coconut S'mores

Recipe Ingredients


6 to 8 graham crackers (the entire rectangle)

1 1/3 cups heavy cream

4 oz bittersweet chocolate, chopped, plus more shaved, for serving

3 large egg whites

2 Tbsp sugar

1/2 cup cream of coconut (not coconut milk)

Recipe Preparation

1. Line the bottom of a 9-in.-square baking pan with parchment paper, leaving an overhang on two sides. Place graham crackers in the bottom of the pan, cutting them to fit as necessary.

2. Heat 1/3 cup of the cream in a small saucepan until it barely begins to simmer; remove from heat. Add the chopped chocolate and stir until the chocolate is melted and the mixture is smooth. Spread the chocolate mixture evenly over the graham crackers. Freeze for 10 minutes.

3. Meanwhile, using an electric mixer, beat the egg whites in a large bowl until frothy. Gradually add the sugar and beat until stiff, glossy peaks form; set aside. In a separate large bowl, using the electric mixer (no need to clean the beaters), beat the cream of coconut and the remaining cup of cream until stiff peaks form. Fold the egg whites into the coconut-cream mixture until fully incorporated.

4. Spread the coconut mixture evenly over the chilled chocolate and freeze, covered, for at least 6 hours or up to 2 days. When ready to serve, use the parchment overhangs to lift and transfer the s’more to a cutting board. Cut into 32 bars and top with shaved chocolate, if desired.

* When using coconut cream, it is best to open the can completely and stir to make sure it has not settled or separated. 

Wednesday, February 09, 2011

WooHoo!!! I love Surprises!!!

I have been waiting so very patiently for a wonderful little surprise to show up on my door step and today it arrived! Remember the apron swap that I joined? Well my SUPER SWEET swap partner sent me an awesome package full of so many things that I just love.  Her name is Madelyn and from reading her blog she really loves her fabric and all the great projects she does.
She sent me a beautiful apron, 2 spatulas that I was in so much need of, 2 lovely valentine dish towels, vintage tissues, hand sanitizer,quilted nail file, a super Moda Sweet Treat bag fabric and instructions aaaaannnd....drum roll please......a cookie cookbook and cookie cutters!!!!  Oh yes, I am typing with my mouth full of the soft peppermints that she included too. I love these things. I am always the one at the wedding reception filling her pockets full of the little pastel mints that taste just like them. Yum! :)
She knew just how to get to this Cookie girl's heart!  I can hardly wait to break open the book for some great recipes and get out my sewing machine to make my treat bag. I am so excited I do not know where to start.


(I had to take the picture my self so that is why my head is cut off.) LOL

THANK YOU from the bottom of my heart Madelyn!!! I love everything!

Wednesday, February 02, 2011

Flirty Apron Swap

Good Evening to you all!  I hope that each one is doing well and warm and cozy in their homes tonight.  The fierce weather that has hit many of you is no doubt a hard blow to your daily lives. My prayers are going up for each and every family that has been affected.  As for us here in the south we are just wet and cold.  But I am looking forward to a soon approaching Spring.
I have been hard at work making a special apron for the Flirty Apron Swap that Shawnee hosts.  This will be my second one and I decided to jump in with both feet and make my first ever full apron.  I wanted to do something a little different and still vintage inspired so I started digging through all of my old aprons.  I found the winner and below is a little history of the original apron.

I have many of my great-grandmother's (Nannie's) aprons that she had made and one in particular is a favorite of mine.  I could not figure out what she would have used it for but I just loved the simplicity of it.  It is solid white and made from cotton sheeting material.  There are no pieces if you will. It is one sold apron with very small rolled hems, no pockets and short ties. It almost reminds me of something a nurse might have worn many years ago and with it being white it looks quite sterile. I decided to call up my sweet Mom and ask her if she remembered the apron.  Well, of course she remembered it! She told me my that Nannie had worked at a commissary kitchen making biscuits. That explained the solid white sterile look for sure and the size, looking like a dress, actually covers almost all of your clothing except the arms.  Neither of us could figure out the short ties though.  Maybe she just pinned it to her clothes.

I took this wonderful apron and used it as my pattern  and of course added my own little touches, longer ties, a pocket, a ruffle and lots of color.  It took me a little longer than expected to get it all together but I am very proud of the results.  I hope that my swap partner likes it as much as I do.  I also included a few tuck-ins to make it a sweet valentine gift to remember.
Enjoy the pictures and don't mind the cheesy blonde in the photo it's just me. :) I hope to see you all back here soon.

Monday, January 17, 2011

4 Things About Me

I just get back into the swing of blogging and I've already been tagged! (Smiles)  It seems that Suzi at Savvy Suzi is just dying to know four things about me.  Well, I hope I do not disappoint and bore you but here goes.

Four shows I watch

Grey's Anatomy
Bones
House
CSI Miami

Four things I’m passionate about

Jesus
My family
Friends
Baking

Four phrases I use a lot

Really?
Seriously?
Obviously!
Well....
Four things I’ve learned from the past

Not to take things in life too seriously (still learning this one)
Friends will come and go but family will always be there for you. Always!
With every mistake there is a lesson to be learned, and learned and learned again!
To laugh at myself once in a while (I should so do this more often)

Four places I’d love to go

New York (I just can't seem to get there)
Israel
Australia
Tahiti

Four things I did yesterday

Went to church
Took down Christmas tree and decorations (Yes, Finally)
Cooked a quick dinner
Clipped coupons (Favorite new hobby)

Four things I love about winter

Warm Fires
Snow
Hot Cocoa & Coffee
The anticipation of Spring

I'm not really sure who to tag at this point since I've been outta the loop so I will just tell you to go visit Suzi at her blog and leave a nice comment and maybe even a cookie recipe if you have one. (Her boys love cookies) Come back soon for some new recipes too!

Thursday, January 13, 2011

It's SNOW good to see you...Happy New Year!

Well, Well, Well....How in the world are you?  Me?  I am doing just fine, thanks for asking!
How long has it been? Oh, seems like years doesn't it? Well, It has ONLY been about nine months since I last posted anything.  I seem to have lost track just a bit and left this little blog unattended. 
Can't say that much has really gone on since the last post that is blog worthy but Hey! it's a New Year so HAPPY NEW YEAR to you all! 

 We have had one heck of a snow for the south.  Although we did not get out and play much due to our lingering sickness I did manage to get a few nice snapshots. 


I personally like the goofy little snowman.  It took every bit of energy we had left in us to get him together but I think he turned out quite cute. He even shows up in the dark due to all of the reflectors and glowing golf balls my husband used on him. (Take note of the eyes, mouth and buttons) 
 GO GATORS!!!

I know this post is quite short and I do hope to have some that are more interesting along with new recipes and pictures throughout the year.  For now I bid you farewell and hope to see you around soon.

The Cookie Girl


Saturday, March 27, 2010

What can you make with $5 ?

I was reading a fellow blogger's post yesterday Laura of Decor to Adore, and in it she was making these cute dish towels for her kitchen. As I read a little further I realized that it was a challenge that she was doing. A $5 challenge to be exact. It all started over at Living with Lindsay and the challenge is to make a Springtime craft using items from the dollar store and spending only $5. I thought it was a pretty neat idea and Laura came up with some awesome ideas.  So I decided to head out to the store and see what I could find. I knew that I didn't have long to make something and I actually think I may have missed the deadline for entering the challenge but I wanted to do it anyway and share it with you. Here is what I bought and also what I used from home to make my craft.


Can you guess what I am making?   An Apron!!! I love aprons and I always have good intentions to make them but never find the time. I love to hang them in my kitchen for seasonal color and decoration. Especially my vintage aprons.  They make the feel of the kitchen very comfortable just having them hanging around.  Aprons always have a story to tell even this one. It was really simple to do using dish towels for the apron and a flower to make a removeable pin. And Yes it all came from the Dollar Tree along with some fabric and supplies I already had at home.

Now before I do this tutorial for you I have to say that I am not the best seamstress in the world nor a great teacher so please be kind if you do not understand my directions. Sewing still confuses me. LOL

I started with four dish towels and attached them side by side with a simple straight seam. I did carefully match up the bottom of the towels to keep it even all the way across. Having it un-even at the top doesn't matter because it will be cut anyway.


Once they were all sewn together I cut about 5 inches off the top to even up the seam and get rid of some of the unwanted length.

I then ran a couple of loose stiches across the top so that I could gather the material easily.


Using my contrasting fabric that I had on hand  I cut out the waiste band and the ties.
The measurements for these are as follows:

Waistband  10"W x 20" L
2-Ties, each 10" W x 24" L


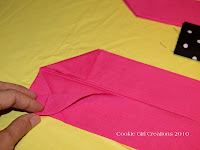
I then folded each piece in half and pressed with an iron. I then folded them in half again and pressed once more. I opened the fabric pieces up and folded each side in to form what looks like bias tape.


I sewed each side seam of the ties to each end of the waistband.


Then I attached the waistband over the top of the apron and pinned it in place.


Starting at the end of one of the ties and using the zig-zag stitch I stiched all the way across the tie, through the waistband and to the end of the other tie.  I went back over the top too just for the fun of it.

To make my big flower pin, I removed the stem and the center of the flower. I attached a yo-yo that I had made and a vintage button with a needle and thread. I then glued down the edges with my hot glue gun. I attached the pin to the back with my glue gun too. Voila!!! Pretty Spring flower.


Once I put it all together it was really a pretty Spring Apron to make.  Not too bad for a quick $5 project.
So HAPPY SPRING EVERYBODY!!!!


Friday, March 12, 2010

Chicken & Broccoli Bake plus Product Review

Howdy All! I hope that each of you have been doing wonderful and are getting ready for the Spring weather. We have had a few beautiful days and now rain again. Either way, it has been a lot warmer and I am all about some warm weather.
In my last post I had told you about a family of online stores called CSN that carries everything from kids bedding to cookware and great gifts for everyone, and that they asked me to review one of the products that they carry.  Well I must say that I recieved the item and I am really enjoying it. Here is the product that they sent me.
Isn't so pretty?  A 13" baker dish in the wheat or gold color if you will. It matches my dinner plates that I already have. The piece is by Signature Housewares and is the Sorrento collection.
They carry a beautiful variety of colors such as the burgundy, sage, ruby and chocolate colors. I love mixing them too.
I have already used the baker for marinating my meats, baking a bread pudding and even baking this new dish I came up with, my Chicken and Broccoli bake.  Is it a healthy dish that works with my new healthy eating habits?  You bet it is!!! It packs a good flavor too.  The baker dish made it look so pretty too.  What a great way to serve your meal in style.
Thanks so much CSN for allowing me to review this great product. I can't wait to get more pieces to go with my collection. 
 Now how about that recipe! A very simple one that can easily be prepared for a weeknight meal. 

Chicken & Broccoli Bake

3 boneless skinless chicken breasts
4 c. broccoli florets
1 1/2 c. low fat chicken broth
3 Tbs. Whole wheat flour
1/4 c. I can't believe it's not butter SPRAY
1/4 c. fat free parmesan style grated cheese
3 slices Double Fiber Bread (dried & made into bread crumbs)
1-2 Tbs. Italian seasoning (I use Herby)
Salt & Pepper

Directions:  Boil chicken with about two tablespoons of salt until tender and no longer pink.
Steam broccoli florets sprinkled with salt if desired,until tender.
Combine bread crumbs with the Parmesan cheese and Italian Seasoning.
Spray bottom of casserole dish with cooking spray. Drain broccoli and add to the bottom of dish.
Shred chicken and add to the top of broccoli.
In a sauce pan over medium/low heat, combine the 1/4 cup butter spray and 3 Tablespoons of whole wheat flour. Whisk into what looks a bit like a thin paste. Slowly add the chicken broth whisking continuously until smooth. Season with pepper if desired. One the sauce has thickened a bit and is bubbly, pour over the chicken.
Cover the chicken with the bread crumb mixture. Bake at 350 degrees for 25-30 minutes.
Enjoy!!!


If you try this recipe, let me know what you think.  Until next time, Happy Healthy Eating!